
1. Open a file that you want to create a snow effect. I opened this photo below.

2. Create a new layer on the Layers panel: Shift + Ctrl + N. Select the Edit drop-down menu < Fill. Choose Black in the Fill window.

3. Select the Filter drop-down menu < Noise < Add Noise. Set Amount to 100%, select Uniform in Distribution, and check out Monochromatic in the Add Noise window. After then, click OK.

4. Choose the Filter drop-down menu < Other < Custom. Set figures like a image below in the Custom window. After then, click OK.

5. Select Rectangular Marquee Tool in the toolbox, and then drag it. Press Ctrl + T like a image below. After then, expand it as big as the whole canvas size.

6. Highlighting Layer 1 in the Layers panel, select Screen like a image below, and the image will have a snow effect like this below. However, you need to make snow look more natural.

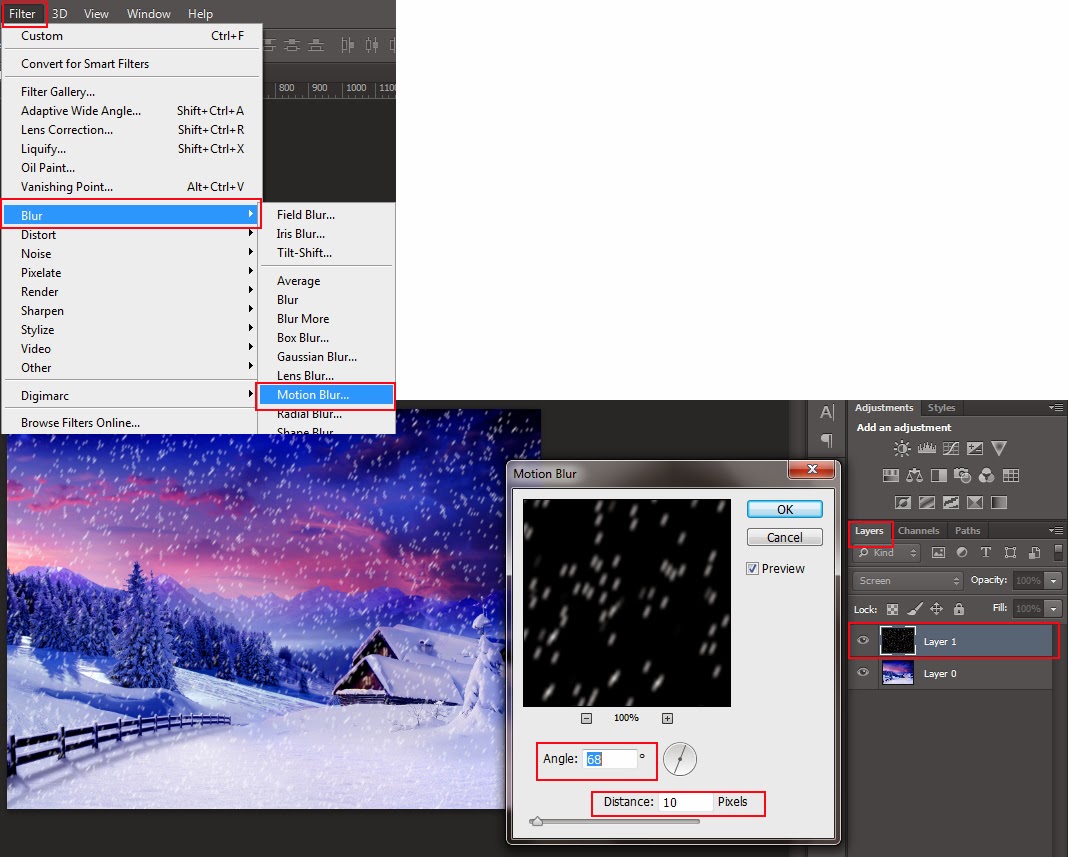
7. Choose the Filter drop-down menu < Blur < Motion Blur. Set Angle to 68 degrees and Distance to 10 pixels; it depends on your photo. You will see a more natural snow effect on your photo.
Here is an output. You can compare before and after below.

No comments:
Post a Comment