
1. Open a photo with pimples, moles, freckles, or wrinkles. I used this photo below. There is a pimple on the face.

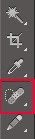
2. Go to the toolbox, and then select Spot Healing Brush Tool; a hot key is J.
3. After then, click the pimple, and it will be removed like the image below. How easy it is!

Here is an output below.

Like Spot Healing Brush Tool, you can use Healing Brush Tool, or Patch Tool in order to fix pimples.
If you want to correct them, using Healing Brush Tool, click a nice skin area on the face, with holding ALT key. After then, drag it and click the place you want to fix, and it will be corrected.

If you want to use Patch Tool to get rid of pimples, select the area at first, using Lasso Tool in the toolbox.

After then, click Patch Tool, drag the selection to a new location, and then release the mouse. You can see the pimple removed.

After removing the pimple, if you need to modify skin tone around the correction, use Blur Tool, Sharpen Tool, Dodge Tool, or Burn Tool in the toolbox. If not, you don't need to do that.

No comments:
Post a Comment