
1. Open a file that you want to create a rain effect. I'm going to use this image below.

2. Create a new layer on the bottom on the Layers panel. Click Default Foreground and Background Colors in the toolbox. Set foreground color to black, and then fill it out on Layer 1; a hot key is Alt + D.

3. Select the Filter drop-down menu < Noise < Add Noise. Set Amount to 150%: the more amount you set, the more rain you can make. Click Gaussian in Distribution and check out Monochromatic. After then, click OK.

4. With highlighting Layer 1 on the Layers panel, choose the Filter drop-down menu < Blur < Motion Blur. Set Angle to 65 degrees and Distance to 35 pixels. After then, click OK.

5. Select "Screen" on Layer 1 on the Layers panel like this below.

6. With highlighting Layer 1 on the Layers panel, select the Image drop-down menu < Adjustments < Levels. Set Input Levels on the Levels window like a image below: it depends on your image.

7. Create a new layer on the Layers panel. Select Gradient Tool in the toolbox and Linear Gradient on the control panel; choose Black, White on it. After then, drag it from top to bottom.
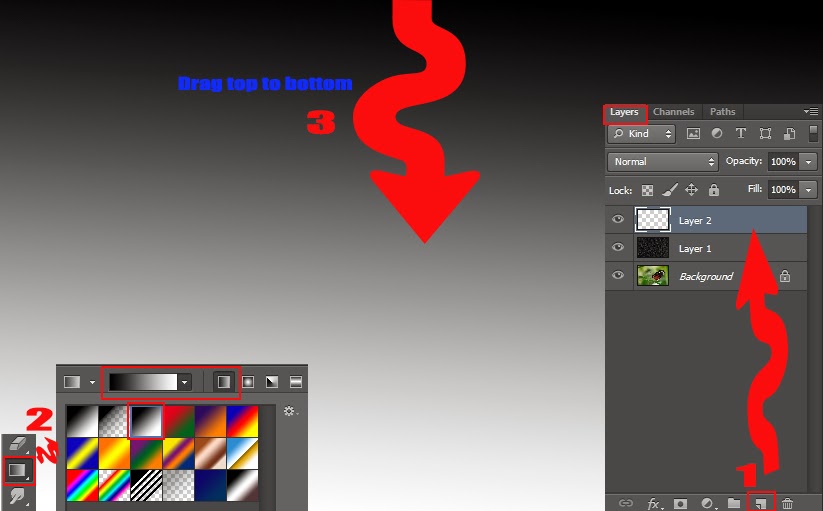
8. If you do so, Layer 2 on the Layers panel will change like this below. With highlighting Layer 2, select Multiply and set Fill to 40%.

After then, you can get a result like this below.


No comments:
Post a Comment